Saturday, April 18, 2009
Friday, April 17, 2009
Spring Veg Soup sent by Jen


- 1 pint grape tomatoes
- 3 tablespoons extra virgin olive oil (EVOO), plus more for drizzling
- Salt and pepper
- Four 1-inch-thick slices crusty bread
- 1 clove garlic
- 1 bunch asparagus, sliced on an angle into 1-inch pieces
- 4 scallions, sliced on an angle into 1-inch pieces
- 1/4 pound green beans, sliced on an angle into thirds
- 4 cups baby spinach, coarsely chopped
- 5 cups chicken or vegetable broth
- 1 cup frozen peas, thawed
- 2 tablespoons chopped fresh parsley
- 2 teaspoons grated lemon peel
- Grated Parmigiano Reggiano
Preparation
Pre-heat the oven to 400°F. On a rimmed baking sheet, toss the tomatoes with 1 tablespoon EVOO and salt and pepper to taste. Roast for 15 minutes. Let cool, then mash.
Pre-heat the broiler, then toast the bread. Rub with the garlic and drizzle with more EVOO.
In a large skillet, heat the remaining 2 tablespoons EVOO, 2 turns of the pan, over mediumhigh heat. Add the asparagus, scallions and green beans; season with salt and pepper. Cook until the scallions are softened, 2 minutes. Add the spinach and cook until wilted, 1 minute. Add the chicken broth and peas and simmer until heated through, 5-7 minutes. Stir in the mashed tomatoes.
To serve, put 1 toast in each of 4 bowls, pour the soup on top and sprinkle with the parsley and lemon peel. Pass the cheese around the table.Thursday, April 16, 2009
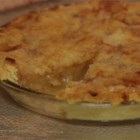
Apple Pie
Dutch Apple Pie
| Original recipe yield 1 - 9 inch pie |
INGREDIENTS
| |
DIRECTIONS
| |
Banana Pudding
Banana Pudding IV

| PREP TIME | 30 Min |
| READY IN | 3 Hrs 30 Min |
INGREDIENTS
- 1 (8 ounce) package cream cheese
- 1 (14 ounce) can sweetened condensed milk
- 1 (5 ounce) package instant vanilla pudding mix
- 3 cups cold milk
- 1 teaspoon vanilla extract
- 1 (8 ounce) container frozen whipped topping, thawed
- 4 bananas, sliced
- 1/2 (12 ounce) package vanilla wafers
DIRECTIONS
- In a large bowl, beat cream cheese until fluffy. Beat in condensed milk, pudding mix, cold milk and vanilla until smooth. Fold in 1/2 of the whipped topping.
- Line the bottom of a 9x13 inch dish with vanilla wafers. Arrange sliced bananas evenly over wafers. Spread with pudding mixture. Top with remaining whipped topping. Chill.
Strawberry Shortcake
BREAKSTONE'S Sensational Creamy Strawberry Shortcake
SUBMITTED BY: BREAKSTONE'S
"Fresh strawberries and creamy vanilla filling are layered between shortcake rounds, topped with whipped topping and more strawberries in this classic summer dessert."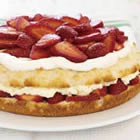
| PREP TIME | 20 Min |
| READY IN | 35 Min |
INGREDIENTS
- 1 1/4 cups milk, divided
- 1/4 cup BREAKSTONE'S Reduced Fat Sour Cream
- 3 tablespoons sugar
- 2 1/4 cups all-purpose baking mix for biscuits
- 1 pkg. (4 serving size) JELL-O Vanilla Flavor Instant Pudding
- 1 (8 ounce) tub COOL WHIP Whipped Topping, thawed, divided
- 4 cups sliced strawberries
- 1/3 cup sugar
DIRECTIONS
- Preheat oven to 425 degrees F. Beat 1/2 cup of the milk, the sour cream and 3 Tbsp. sugar in large bowl with wire whisk until well blended. Stir in baking mix until just moistened. Spread evenly into greased 9-inch round cake pan. Bake 12 to 15 minutes or until top is golden brown. Remove from pan to wire rack; cool completely.
- Add remaining 3/4 cup milk to dry pudding mix in medium bowl. Beat with wire whisk 2 minutes or until well blended. Gently stir in half of the whipped topping. Toss strawberries with 1/3 cup sugar; set aside. Cut cake horizontally in half to make two layers.
- Place bottom cake layer on serving plate; top with half of the strawberry mixture. Spread with pudding mixture; cover with top cake layer. Spread with remaining whipped topping; top with remaining strawberry mixture. Serve immediately. Store any leftover shortcake in refrigerator.
Wednesday, April 15, 2009
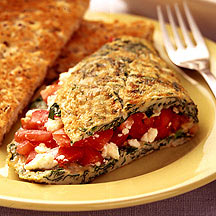
Spinach, Tomato and Feta Omelet
This is my very favorite breakfast and so easy!
Spinach, Tomato and Feta Omelet
Spinach, Tomato and Feta Omelet
| |
breakfast
| POINTS® Value: 4 Servings: 2 Preparation Time: 13 min Cooking Time: 12 min Level of Difficulty: Easy |
| Looking for a way to pack in more vegetables? Try an omelet. We loaded our eggs with spinach and then stuffed them with tomatoes and feta. |
Ingredients
| | 1 large egg(s) |
| | 3 large egg white(s) |
| | 1 cup(s) spinach, choppped |
| | 1/2 tsp dried oregano |
| | 1/4 tsp table salt |
| | 1 spray(s) cooking spray |
| | 2 small tomato(es), chopped |
| | 2 tbsp feta cheese, crumbled |
| | 4 slice(s) reduced-calorie wheat bread, toasted |
Instructions
- Combine egg, egg whites, spinach, oregano and salt in a medium bowl; beat until well-blended.
- Lightly coat a 9-inch nonstick skillet with cooking spray; heat over medium heat. Pour egg mixture into skillet and spread to cover pan. Cook until bottom is lightly browned and firm, about 5 to 6 minutes. With a large spatula, flip omelet and cook other side until center is set, about 3 minutes more.
- Transfer omelet to a platter. Sprinkle tomatoes and cheese on one half; fold over other half to cover. Allow to stand 1 minute; cut in half crosswise and serve each piece with 2 slices of toast.
Notes
- You can also serve the feta and tomatoes on top of the omelet or on the side.
Tuesday, April 14, 2009
Freezing Tomatoes
Ingredients and Equipment
|
|
Process - How to Make Spaghetti Sauce from Fresh Tomatoes
Step 1 - Selecting the tomatoes
It's fun to go pick your own and you can obviously get better quality tomatoes!
At right is a picture of tomatoes from my garden - they are so much better than anything from the grocery store. And if you don't have enough, a pick-yo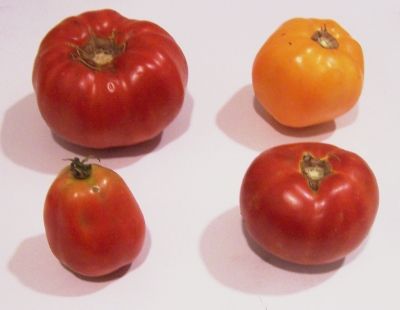 u-own farm is the pace to go! Below are 4 common varieties that will work:
Top left: Beefsteak
Bottom left: Roma, paste-type
Top right: Lemon Boy, yellow
Bottom right: Better Boy
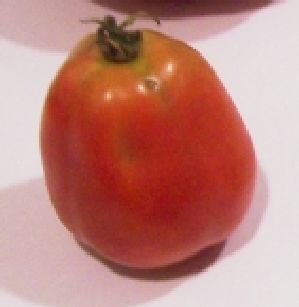 The picture at right shows the best variety of tomato to use: Roma; also called paste tomatoes. They have fewer sides, thicker, meatier walls, and less water. And that means thicker sauce in less cooking time!
Also, you don't want mushy, bruised or rotten tomatoes!
Step 2 - Removing the tomato skins
Here's a trick you may not know: put the tomatoes, a few at a time in a large pot of boiling water for no more than 1 minute (30 - 45 seconds is usually enough)
then.... 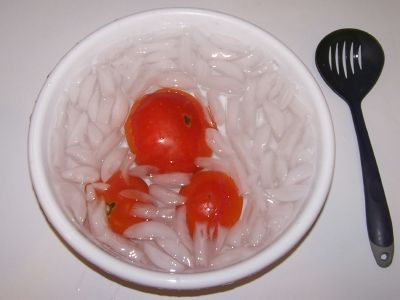
Plunge them into a waiting bowl of ice water.
This makes the skins slide right off of the tomatoes! If you leave the skins in, they become tough and chewy in the sauce, not very pleasant.
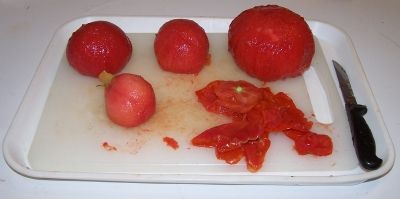 Step 3 - Removing the skins, bruises and tough parts
The skins should practically slide off the tomatoes. then you can cut the tomatoes in quarters and remove the tough part around the stem and any bruised or soft parts.
After you have peeled the skins off the tomatoes, cut the tomatoes in half. Now we need to remove the seeds and excess water.
Note: why remove the skins? They become tough and discolored in storage. You wouldn't want to eat them!
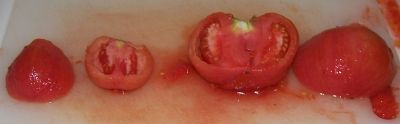
Step 4 - Squeeze of the seeds and water
Just like it sounds: wash your hands then squeeze each tomato and use your finger or a spoon to scoop and shake out most of the seeds. You don't need to get fanatical about it; removing just most will do. Here are before and after photos:
![]()
Step 5 - Drain the tomatoes
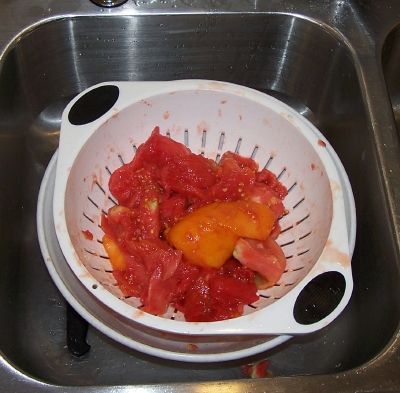 Toss the squeezed (Squozen? :) tomatoes into a colander or drainer, while you work on others. This helps more of the water to drain off. You may want to save the liquid: if you then pass it through a sieve, screen or cheesecloth, you have fresh tomato juice; great to drink cold or use in cooking! By draining the water off now, you'll end up with a thicker spaghetti sauce in less cooking time! And that preserves vitamins (and your sanity).
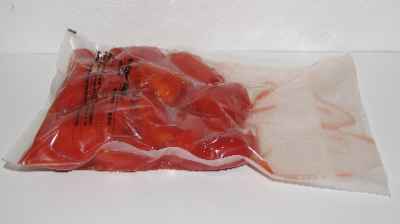
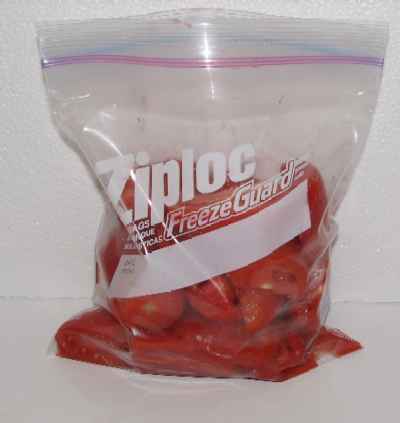
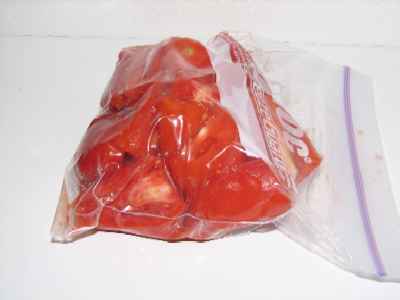
Step 6 - Fill the freezer bags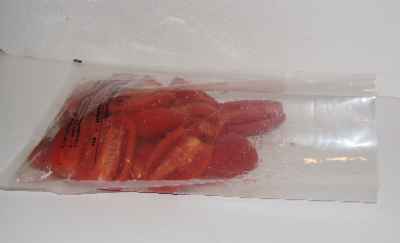
Don't overfill the bags, leave a little room for expansion. Do try to avoid leaving any air pockets! A vacuum bag is shown at left, but you can use ziploc (or similar) bags, show below. But be sure to squeeze out the extra air (below left is before, below right is after squeezing out the excess air)
Step 7 - Vacuum seal the bags (if you have a vacuum sealer)
 Obviously if you haven't got a vacuum food sealer, just inspect the bags and you may need to open them and reseal them to eliminate any air pockets!
TIP: If you don't a vacuum food sealer to freeze foods, place food in a Ziploc bags, zip the top shut but leave enough space to insert the tip of a soda straw. When straw is in place, remove air by sucking the air out. To remove straw, press straw closed where inserted and finish pressing the bag closed as you remove straw.
Step 8 - Freeze the bags
 Pop them into the freezer (on the quick freeze shelf, if you have one). Now leave them for 2 or 3 hours till frozen.
Put in the back (coldest part) of your freezer
And wait for a cold winter night when it is dark and dreary out, to remove it and defrost (microwave works well) and use in making so fresh tasting spaghetti sauce or other tomato cooking!
Subscribe to:
Comments (Atom)